Windshield Chip Repair
Windshield rock chip repair is a straightforward auto glass repair process that can restore the structural integrity of your vehicle's glass, prevent further damage, and improve visibility. The chip repair process typically involves several key steps designed to remove air from the chip and fill the void with a specialized resin. The detailed windshield repair process uses a device called an injector to create a vacuum, inject resin under pressure, and cure the resin.
Preparation and Cleaning: The technician thoroughly cleans the damaged area of any loose glass, dirt, and debris using a probe or razor. This ensures a clear path for the repair resin to bond correctly with the glass and prevents contaminants from becoming trapped in the repair.
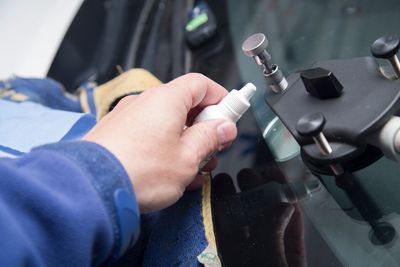
Mounting the Repair Tool: A specialized repair bridge or injector tool is mounted over the chip using suction cups. This tool creates a seal around the impact point and provides the necessary mechanism for the subsequent steps.
Creating a Vacuum: The repair tool's injector is used to create a vacuum over the chip. This crucial step evacuates all trapped air and moisture from the crevices of the damage, making room for the resin.
Injecting the Resin: The repair resin is injected into the injector head and pressure is applied, forcing the resin into the evacuated area. The pressure is often cycled to ensure the resin penetrates the entire star break or bullseye of the chip.
Curing the Resin: Once the chip is completely filled, the injector is removed, and a drop of the resin is placed over the impact point. A curing strip (a clear plastic film) is placed over the resin, and a UV light is used to cure and harden the resin, bonding it with the glass.
Finishing and Polishing: The technician uses a razor blade to gently scrape off any excess cured resin until it is flush with the windshield's surface.